Baldnerd’s 360 Portrait Studio

Create beautiful 2D images from 360-degree equirectangular sources, ready for print, social media or sharing.

BUY BALDNERD’S 360 PORTRAIT STUDIO TODAY

  • For Windows: Buy Now (Free Perk for Cat5TV Patrons)
  • For Linux: Buy Now (Free Perk for Cat5TV Patrons)
  • For Mac: Buy Now (Free Perk for Cat5TV Patrons)

Whether you’ve purchased a DJI OSMO 360 II, an Insta 360 X6 or even the airborne DJI Avata 360 drone, you’ll end up with some incredible 360 photos that are difficult to edit or view on traditional displays, and even more difficult to print.

Baldnerd’s 360 Portrait Studio is a desktop application designed to bridge the gap between immersive 360-degree photography and traditional 2D formats. It allows photographers to load full spherical photos, perfectly frame a specific subject, apply professional-grade color corrections, and export standard, flat images ready for print or social media.

Application Screenshot

TURN THIS: Equirectangular 360-Degree Projection

INTO THIS: 4x6 Horizontal Export from Baldnerd's 360 Portrait Studio

Key Features

Virtual Camera Framing

  • Intuitive Controls: Drag directly on the image to look around, zoom with scroll wheel, use the arrow keys to nudge the camera, or dial in the exact Pan, Tilt, Horizon Roll, and Zoom.
  • Dewarping: A custom mathematical lens correction that eliminates the unnatural wide-stretching that typically distorts people and objects near the edges of 360-to-2D image conversions.
  • Format Ready: Includes standard framing guides (4:6, 5:7, 8:10, 16:9, 1:1) with a one-click toggle between Portrait and Landscape orientations.

Professional Image Enhancement

  • White Balance: Using the Eyedropper tool, click any white or neutral gray area in the image to instantly calculate and apply accurate white balance.
  • Improve Color: Dial in Brightness, Contrast, Shadows, Highlights, and Saturation.
  • Clarity: An auto-leveling tool that dynamically balances exposure across mixed-lighting scenes.

Special Effects & Retouching

  • Noise Reduction & Beautify: Smooth out high-ISO grain and apply skin softening while preserving hard edges.
  • Sharpen: Crisp up soft photos with a built-in unsharp mask.
  • Edge Blur & Vignette: Soften and darken the perimeter of the frame to naturally draw the viewer’s eye to the center subject.

Intelligent Workflow & Performance

  • Progressive Rendering Engine: The interface stays fast and fluid by rendering a lightweight proxy image while you move sliders, seamlessly rendering the ultra-high-resolution preview the moment you let go.
  • Instant Bypass: Hold the Spacebar at any time to temporarily bypass all effects and compare your current edit to the raw image.
  • Embedded Presets & Metadata: The software preserves key EXIF data (GPS, Date Taken, Camera Model). It also embeds your exact slider settings directly into exported JPEG file.
  • Import Settings: Click “Import Settings” and select any previously exported photo to instantly load its exact look and apply it to your current image.

Included Samples

  • Experiment, practice or simply test the tool with provided sample 360 photos.
  • All sample images are licensed under the terms of the Creative Commons Zero (CC0) dedication, and may be used by anyone for any purpose, commercial or otherwise, without restriction.
  • All sample photos are taken by Robbie Ferguson on a DJI OSMO 360 II camera unless otherwise noted.

Baldnerd’s 360 Portrait Studio is open source software created by me, Robbie Ferguson, and I’m incredibly proud of what I’ve achieved with this incredible tool. I built it specifically because I wanted a better tool than what was officially made available by my 360 camera manufacturer, and in my typical style, I want to share what I created with you, too. While I share the source code for free, the official binaries are not free, and only available by either direct purchase or Patreon support (which should exceed the selling price of the program; I appreciate your honesty).

Thank you for supporting my efforts in creating awesome open source products like this one!

BUY BALDNERD’S 360 PORTRAIT STUDIO TODAY

  • For Windows: Buy Now (Free Perk for Cat5TV Patrons)
  • For Linux: Buy Now (Free Perk for Cat5TV Patrons)
  • For Mac: Buy Now (Free Perk for Cat5TV Patrons)

Aurisona Dev Update 2: Audio Profiles, Presets, and UI Beginnings

Today was another big day for backend development on Aurisona.

As tempting as it is, rather than jumping straight into Unreal Engine, I’ve concentrated my focused on building a solid foundation for user authentication, settings storage, and dynamic audio delivery. The goal is to have a fully functional system before layering in the visuals. That way, when the time comes to build the in-game experience, everything just works: user preferences load instantly, music streams dynamically, and the game is optimized from the get-go.

Today I laid the groundwork for sound profiles and user presets. Now players will be able to choose between preset audio environments like “Sleep Mode” or “Custom Mix” and the system will automatically apply compression, EQ, and separate volume levels for music, nature, and voice. Because I want to maintain a consistent experience across devices, settings save to the user’s account, and free users will have access to presets while premium users can additionally unlock full customization.

To support that, I created a new audio_presets table and added API endpoints to fetch available presets, apply them to a user, and save or retrieve custom settings. These settings are tied into the user’s account, which means they sync across devices and persist between sessions.

Once that was complete and thoroughly tested via the API, I shifted gears and finally started the Unreal Engine portion of the project.

I started by upgrading to Unreal Engine 5.6 and decided to begin with a Blueprint project, since it’s faster for prototyping UIs and interacting with APIs, which is especially important during this early phase… especially since I am eager to see the game take shape, and only have a limited amount of time off from my day job. I set up the project from scratch; an empty world, and began building the login screen. After wiring up the email and password fields in UE, I started building the login logic in Blueprints.

I was running short on time at the end of the day when I realized UE doesn’t natively support JSON in Blueprints. So I did a bit of quick research online and ended up adding the “JSON Blueprint Utilities” plugin to fix that. With that in place, I’ll be able to build the JSON payload from user input and prep the system for posting securely to the login endpoint.

The beginnings of a login Blueprint in Unreal Engine. Preparing to connect the game engine with the JSON API backend.

I’m eager to see the backend and frontend finally shake hands. Today brought me one step closer to that moment. Next, I’ll finish the HTTP request logic inside Unreal, parse the response, and save the user’s session tokens locally. Once that’s in place, the client will be able to load each user’s preferences and audio settings directly from the cloud.

The foundation is now fully in place: authentication, presets, user-specific profiles… and I’m nearly ready to start pulling that into the in-game experience.

Tonight, as I head to sleep, I’ll be listening to the first music library I’ve been working on for Aurisona. One last listen to get a sense of any anomalies or spikes in dynamics that draw a listener out of rest. It’s my way of curating, scrutinizing, and ultimately finalizing each musicscape. It’s my way of ensuring the music is effective, beautiful, and perfect for Aurisona.

Here’s to a very restful night’s sleep!

Aurisona Dev Update 1: Laying the Groundwork

It all starts with infrastructure. Phase 1 of Aurisona’s development is focused entirely on building the essential systems that will power the game.

I’ve been deep in server work, spinning up the first LAMP stack server with NGINX acting as a reverse proxy for Apache (which serves the main website) while also handling the game’s API endpoints. It’s a hybrid setup that balances efficiency with flexibility.

Most of my energy so far has gone into designing and building a fast, optimized database schema and secure API layer to match. I’m taking the time to do it right, because these are the systems that everything else depends on.

The first major system to take shape has been the user authentication and settings infrastructure. I’ve built a secure login system with long-lasting session tokens, complete with refresh tokens for persistent logins across devices. Behind the scenes, every user’s settings, from audio preferences to playback behavior, are stored in a clean, scalable way that will sync across platforms.

My years in radio broadcast experience are helping shape my decisions around the music layer of Aurisona. I’m designing the music delivery system with performance and immersion in mind. The game client never downloads full music libraries; instead, it requests individual tracks as needed, saving a ton of space on your mobile or VR hardware while still delivering a vast assortment of beautiful music to accompany the nature sounds in the game. The system remembers what songs you’ve already heard, spaces out repeats intelligently (dayparting), and ensures the playback feels organic with cross-fades and dynamic compression to ensure the volume remains consistent from song to song. I’m even preparing support for special audio modes (like “Sleep Mode” or “Study Mode”) with tailored EQ, compression, and volume settings. All this without requiring massive installs or storage space on the player’s device.

This is still just the groundwork, but it’s essential groundwork. The goal for Phase 1 is to have a stable and secure back-end capable of supporting a fully immersive, audio-first exploration game across desktop, mobile, and VR platforms.

Next steps include building the nature sound engine, real-time zone-aware audio loading, and integrating the player’s in-game location and biome data into the audio system. After that, I’ll shift toward visual prototyping… but only once the foundation is solid. That is a step I can’t wait for. To be able to bring my vision to life and share screenshots and videos is something I’m really excited for. I’ve been staring at a bash window far too long.

More updates to come as the game unfolds. For now, back to the console.

New Game Announcement: Aurisona

I’ve been secretly working on a game concept for nearly 3 years. It’s called Aurisona and I’m truly excited to announce that I’ve officially begun development.

What is Aurisona?

A Meditative Journey Through Sound and Nature

Aurisona is a peaceful, immersive exploration game where players walk a serene hiking path through beautifully rendered natural environments. From tranquil forests at dusk to babbling brooks, crackling campfires, and hidden clearings, every step is alive with the subtle, realistic sounds of nature—presented in high-fidelity, binaural spatial audio.

Whether experienced in VR, on a mobile device with headphones, or on PC, Aurisona is designed as an ambient experience you can truly feel. There’s no combat, and no objectives… just the freedom to wander, listen, breathe, and be present in the moment.

Aurisona is uniquely positioned to serve:

  • Players with anxiety, sensory needs, or burnout,
  • Users with limited mobility or chronic illness,
  • Residents in care facilities, hospitals, or assisted living,
  • Mindfulness practitioners and their patients,
  • Listeners who simply enjoy the peaceful sounds of nature while working, sleeping, or going about their daily tasks.

Aurisona’s Visual Experience

Aurisona is stunning. I’m working hard to make it as photorealistic as possible. Even the gameplay mechanics are designed from the ground up to be entirely organic. Having never played Aurisona before, any player with any technical skill level (or none at all) will be able to navigate with ease.

Aurisona’s Auditory Experience

When you go for a nature walk in the real world, you hear birds all around you, crickets, a gentle breeze in the leaves of tall trees. You don’t hear it the same as a traditional stereo audio recording: The sounds are all around you. That’s what truly sets Aurisona apart: Using fully-immersive binaural audio technology, the sounds of nature while you navigate Aurisona are everywhere, surrounding you. Close your eyes and you feel as if you’re there.

Bask in Nature

Hike the trail in Aurisona and find a spot along the path that offers the soundscape you are looking for. Rest there and enjoy the sounds of nature presented in fully-immersive 3D sound. Blank your device screen and listen as long as you like.

The Early Days

While sitting on my deck one gorgeous summer day in 2022, overlooking our forest, I began to contemplate how I wished I could enjoy that moment all year round. How I wished I could eliminate the sound of the speeding cars on the nearby thruway, and how I wanted to just live in that point in time for as long as possible, with the sounds of songbirds, cicadas and playful squirrels calming my stressed mind.

It was there and then that I began to consider how I might combine what I’ve learned about photorealistic game development while producing VR-based episodes of Category5 Technology TV, with my passion for recording binaural nature sounds.

I almost immediately started recording soundbites. The very first was a lone cricket who was making a lot of noise outside my front window, seemingly performing for me. He was sitting still on the stone patio at my front door, calling out all on his own. So I setup my recording rig (an H4N at that time) and recorded him for about 30 minutes.

That recording sat on my SD card for a year.

I planned the game mechanics, sketched out some ideas, and studied binaural audio techniques, Unreal Engine Blueprints related to spatial audio, and ultimately created the Category5 Matrix spoof as a testing ground, where, in the fly over that occurs after the camera transitions into the vintage TV set, you can hear my first-ever in-engine binaural soundscape. If you listen to that clip with headphones, you’ll notice a lot of elements surrounding you. That was an early test of the techniques I had been learning, to prepare me for the inevitable development of Aurisona.

On August 23, 2023, I imported the cricket audio file, sliced up the recording into dozens of individual chirps, and built the first test environment for Aurisona: A chair in virtual space, surrounded by crickets. The experience was incredible.

First binaural audio test for Aurisona. August 23, 2023.

Nearly two more years of planning, designing the game mechanics, layout and backend on paper, and here we are: June 11, 2025.

What’s in a Name

Aurisona is a constructed word derived from the Latin auris (meaning “ear”) and sonare (“to sound” or “resound”), suggesting a resonant, auditory experience intended for listening and immersion. Aurisona is a game by Robbie Ferguson (proprietor, Category5 TV Network), designed to transport players into richly detailed natural environments through the power of spatial audio. The game invites users to explore peaceful biomes, discover ambient soundscapes, and connect with others through shared moments of virtual nature.

Aurisona game development has begun!

Asian-Inspired Savory Peanut Noodles

This savory, umami-packing dish is a hit every time. It’s another of my recipes that’s easy to accommodate either meat eaters or vegetarians, and depending on your choice of noodle, it can even accommodate a vegan diet. As a meat-eater myself, I love the tofu version. I encourage you to give it a try as written, and then play around with it if you want to try something different.

This feeds my family of 5 with some leftovers. Simply adjust the amount of noodles and prepare as written to feed up to 8 people.

Ingredients

  • A batch of my vegan “egg” noodles, or two packages of fresh chow mein (may contain egg).
  • 2-3 tbsp Fresh Ginger Root, Peeled. If you like spicy, lean toward 3 tbsp. It doesn’t have to be exact.
  • 2 Large Garlic Cloves, Peeled and Basal Plate Removed (the woody part where the roots grow out of).
  • 1 Cup of your favorite Peanut Butter
  • 1/4 Cup Standard Soy Sauce (I like Kikkoman Naturally Brewed, which can be bought in bulk jugs)
  • 1/4 Cup Dark Soy Sauce
  • 1/2 Cup Water or Vegetable Broth
  • 6 tbsp Apple Cider Vinegar
  • 4 tbsp Toasted Sesame Oil
  • 2 tsp Sriraccha (I usually just aim to fill my tbsp measurer to approximately 3/4 full; saves dirtying an extra dish)
  • 4 tbsp Canola Oil (for frying)
  • 2-3 Packages of Extra Firm Tofu (or for a meat version, 2-3 Boneless Skinless Chicken Breasts, Cubed)
  • 4 Cups Roughly Chopped Cabbage (Any kind of green cabbage will do)
  • 2 Heads of Broccoli, Cut Into Bite-Sized Florets (no stem pieces)
  • 1 Can Baby Corn, Drained and Rinsed, Cut Into 1-Inch Segments
  • Optional: Green Onions, Thinly Sliced; Roasted Black Sesame Seeds

Directions

  • Put your tofu blocks in the freezer for 2 hours, and then place at room temperature for 30 minutes or so. This improves the texture of the tofu, making it much more chicken-like.
  • Cut the tofu into 1-inch cubes. Place evenly on a paper towel-lined cookie sheet. Cover in paper towel and place a second cookie sheet on top, with a pot or something on top to add a bit of gentle weight to press the tofu cubes. Let sit until needed.
  • Combine all sauce ingredients in a food processor (Ginger, Garlic, Peanut Butter, Soy Sauce, Water/Broth, Apple Cider Vinegar, Sesame Oil, Sriracha) No need to chop the garlic or ginger: The food processor will take care of it. Blend until smooth, approximately 30 seconds. Set aside.
  • Prepare a pot of water for cooking the noodles. It can simmer while you proceed with next steps.
  • In a large wok over medium-high heat, warm the canola oil, and then add your tofu, frying each side (approximately 12 minutes total). Replace the damp paper towel on the cookie sheet with dry paper towel, and return the fried tofu to the cookie sheet to rest.
  • Begin cooking the noodles.
  • In the same wok from the tofu, add the cabbage and broccoli and saute until soft and tender, approximately 8 minutes.
  • Reduce heat to medium and add the sauce, baby corn, and the fried tofu, mixing everything to coat well.
  • Once they’re ready, transfer the cooked noodles into the wok and mix to coat.
  • Serve; Garnish each portion with green onion and a dusting of roasted black sesame seeds.

Allergy Warning

This delicious, savory recipe contains peanuts, soy, sesame, gluten and corn. It may also contain eggs, tree nuts, and other allergens depending on your choice of ingredients. Vegetable broth may contain mustard.

send_packet6: Operation not permitted

The Problem

My syslog shows:

dhclient[24931]: send_packet6: Operation not permitted
dhclient[24931]: dhc6: send_packet6() sent -1 of 56 bytes
dhclient[367]: XMT: Solicit on eth0, interval 122930ms.
dhclient[367]: send_packet6: Operation not permitted
dhclient[367]: dhc6: send_packet6() sent -1 of 56 bytes

The Cause

DHCP for IPv6 uses different ports than IPv4, so your IPTABLES / CSF firewall may need to have its rules adjusted if you start using IPv6.

The Solution

Set your firewall to allow UDP in/out for:
IPv4: 67,68
IPv6: 546,547

That’s it. The error is gone.

Robbie // The Bald Nerd

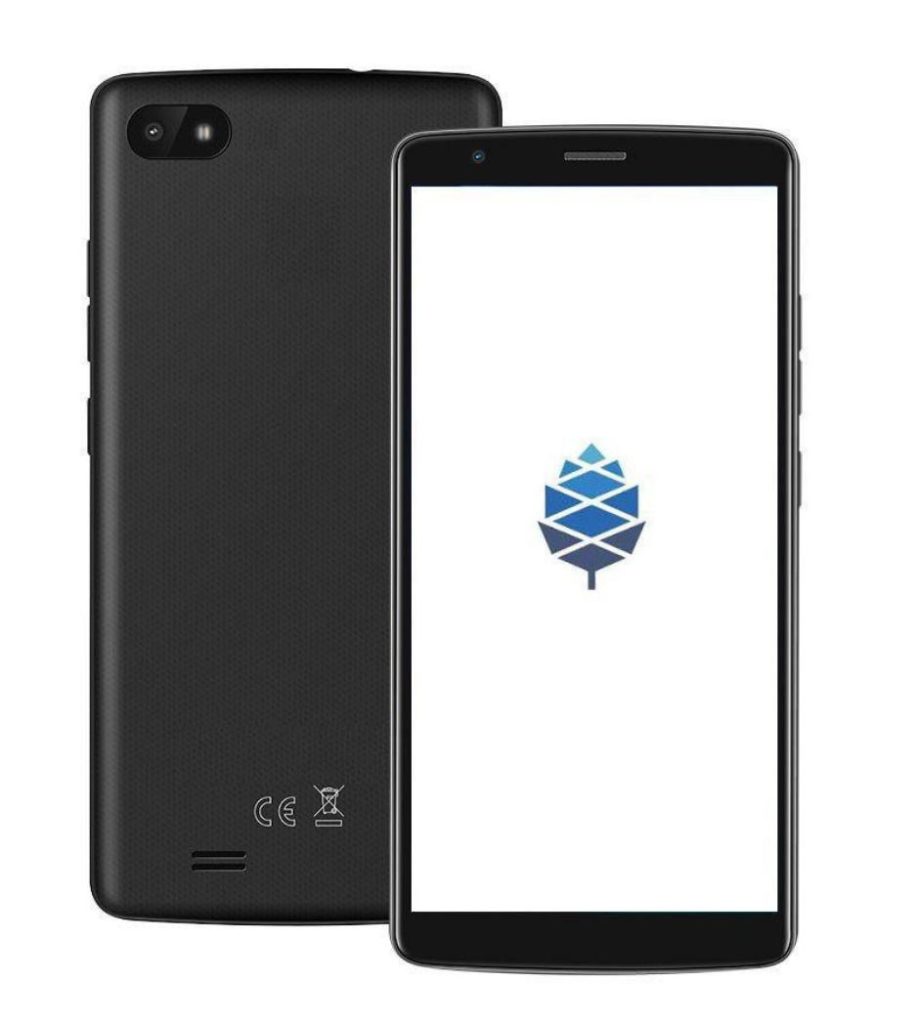
PINE64 has [nearly] finalized the PinePhone design

PinePhone design as of February 21, 2019

It has a headphone jack, USB-C with video output, data transfer, and 5V fast charge, and PINE64 is about 90% sure they’ve got the final design, with a few possible modifications still to come.

At Category5 TV, we’re really excited about the privacy features of the PinePhone, as discussed with Lukasz Erecinski during our recent interview. The ability to turn off the cameras, cellular data, WiFi, Bluetooth and speaker using hardware switches is definitely a sought after feature for the privacy-minded user. It comes as a bit of a surprise at first that these hardware privacy toggles will be hidden beneath the “easily removable” back cover. However, with a little more thought I begin to realize that this could be a really, really good thing. Albeit inconvenient for the impromptu Skype call with mom.

From a privacy perspective, it makes a lot of sense that the switch that re-enables your camera is hidden from accidental switching, or even from another person enabling it: Hand your child your phone to play a game and don’t worry about them accidentally triggering the camera. Similarly, it gives me great peace of mind knowing for sure that my LTE data plan isn’t being used in the background. My data minutes are a rare resource that we must conserve.

A headphone jack is very much a necessity. Personally, I listen to audio books and podcasts at night. I am not going to use Bluetooth headphones for that. I use a pillow speaker, which is ideal for nighttime listening. It also stands to be noted that the PinePhone, at a target price of just $150, is a budget phone: it is possible it will be used in markets where Bluetooth headphones (which cost significantly more than wired headphones) are not practical. At least having the headphone jack gives the budget, hard-wired option. It also means the PinePhone can be used to play music at events via loudspeaker. I know, it sounds silly, but I know businesses and restaurants who simply plug their phone into an amp to play music for the customers.

For the current mockup, PINE64 intends to put the headphone jack at the top of the phone. That’s exactly where I want it. However, some people argue it should be on the bottom. I suppose this is a personal preference thing. Back to my pillow speaker, for me, having it on the bottom would be inconvenient (my wall charger is on the far side where my pillow speaker plugs in on the opposite side). So, PINE64, being the community-centred company that they are, put it to a vote:

The speaker, at least for now, is on the back of the phone. I’m not particularly keen on that design features since it means the audio for the video I’m watching will be better heard by the person sitting across from me. But PINE64 says this may change in the final, final design.

The PinePhone will feature the typical volume rocker on the side of the phone, along with a lock button.

Here’s what we know so far about the upcoming PinePhone specs:

  • USB-C for data and charging, with HDMI Video Output (requires an adapter or special cable)
  • Bluetooth + WiFi
  • 4G LTE
  • Privacy (hardware) switches for BT/WiFi, LTE, cameras, speaker
  • eMMC module socket
  • mSD Slot
  • Gyro magnetic sensor
  • Light sensor
  • Volume, power, reset, home buttons
  • Audio aux
  • MiPi and TP interfaces
  • 2mpx and 5mpx front / back cameras
  • Small and compact size of (approx. 165x77mm)
  • 1440×720 IPS panel
  • SOPine module: Allwinner A64 with 2GB of LPDDR3 RAM
  • Price Target: $150

I’m really eager to start hearing of some manufacturers working on cases for the PinePhone. As of yet, I have not seen anything coming down the wire. But I’m really hoping we’ll see some attractive protective cases and screen protectors that will be suited to this new device.

I’ll continue to keep you updated as I learn more.

Here’s what PINE64 has to say on Twitter:

Pinebook Pro – Hackable ARM64 Linux Laptop for $200

The Pinebook, released in 2017, was–and still is–an exciting product. The company responsible, PINE64, created a low-powered, low cost ($99) System on a Chip (SOC) laptop. But while the Pinebook is fantastic for tinkering and basic Internet usage, it was never intended to be a day-to-day laptop replacement1. Rather, it provides tinkerers a way to learn Linux and ARM without the need of a separate single board computer (SBC), keyboard, mouse and screen.

PINE64 has firmly established itself as one of the most highly-respected SBC manufacturers in the world, and the Pinebook proves that they refuse to be put in a box. Led by their founder TL Lim, PINE64 are a creative and innovative company, with a solid grasp on the needs of not only the makers and tinkerers, but also of the free and open source software fanatics, as well as the hardware hackers. All this while demonstrating a clear understanding of what the related community mentality is all about. Put all these traits together, combined with the talents of the wonderful people who comprise the PINE64 team, and you’ve got a force to be reckoned with, with a company whose products appeal to a very wide range of users.

Now, it’s 2019 and the Pinebook is evolving.

Today, PINE64 is unveiling the new Pinebook Pro, which is going to change the exciting world of SOC laptops.

With a target price of just $199 USD, the expectations surrounding the Pinebook Pro are quite different than those of the original Pinebook. I had the privilege of chatting with Lukasz Erecinski from PINE64 and he believes the 64-bit ARM Pinebook Pro could be used as your daily laptop, offering a compelling alternative to a mid-range Chromebook with some impressive specs for the price.

During our discussion, Erecinski says, “It is much more powerful than the Pinebook, it has much more memory; 4 gigs of RAM, and we expect that this could really be a daily driver.”

This changes everything. Erecinski says that there are “so many people out there who take a Chromebook and transform it into a Linux laptop. We looked at that market and we thought, what about a proper laptop? A real laptop replacement based on ARM64 architecture that is built from the ground up with free and open source software in mind, having features which you rarely find on high-end or mid-range Chromebooks such as a lot of internal storage, a 1080p IPS panel, as well as high-quality materials for the build.” He goes on to explain, “We’re using aluminium alloy for the Pinebook Pro.”

A First Look at the Pinebook Pro

Erecinski says of the Pinebook Pro, “in a sense, it is a part of the RockPro64 lineage: it features the same SOC, same memory, and we expect it to be completely compatible with the single board computer that we had rolled out last year.”

From the Pinebook Pro to the Open Source IP Camera “CUBE”, a retro gaming case, and an updated Rock64 and H64 – PINE64 has more to tell you about… Watch the full interview with Lukasz Erecinski on my YouTube channel:

The Pinebook Pro has a 14″ IPS LCD screen at full 1080p resolution, plus support for digital video output via USB-C. By default, the Pinebook Pro comes with 64 GB of eMMC storage, has a 10,000 mAh battery, and like we’ve come to expect from PINE64, the Pinebook Pro is built to be hackable.

The folks at PINE64 are freaking awesome and know how to show their community love. As a way to thank their community, they’re doing something more: If you are a registered user in the PINE64 forum, PINE64 will upgrade the eMMC in your Pinebook Pro to a whopping 128 GB eMMC, no extra charge!

The original 11.6″ Pinebook (2017)

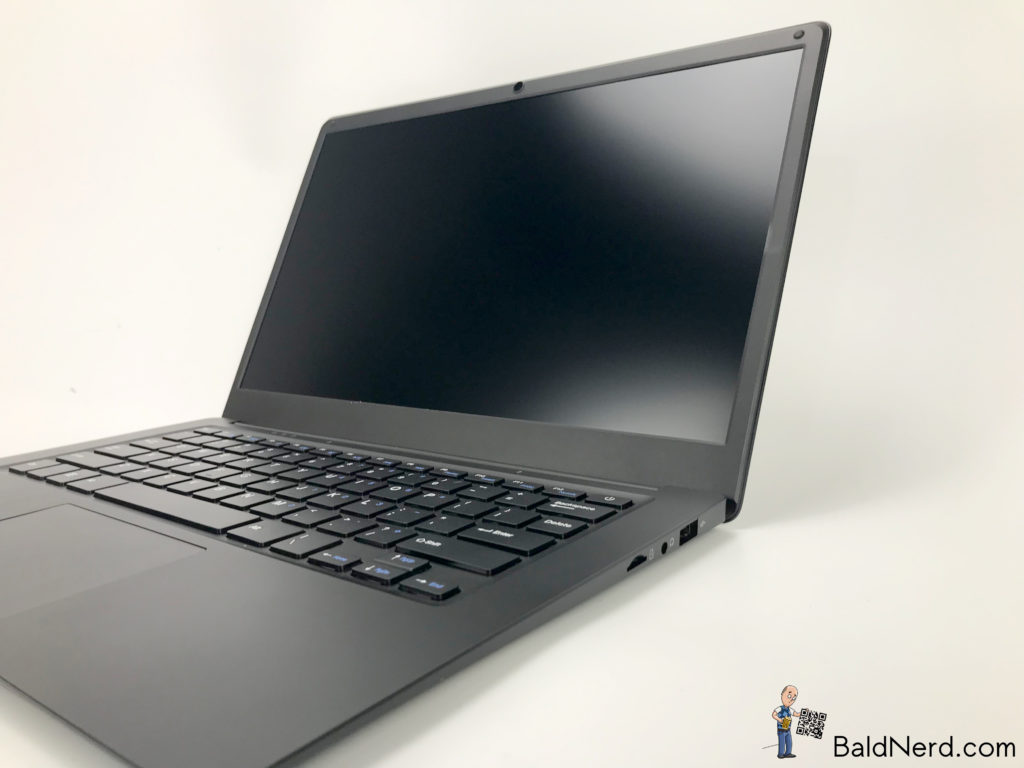
The original Pinebook–as awesome as it is in its own right–feels cheap. It’s plastic. It’s white. It looks and feels a bit like a toy. The Pinebook Pro however feels solid with its magnesium alloy (aluminium) body, which also has a much higher-end look to it with an attractive matte black finish. It’s super thin, which really gives it that look of a much higher-priced laptop.

As was the case with the original Pinebook, the Pinebook Pro features minimal branding. Take that as you will, but I think it gives the Pinebook Pro a very refined look. I can’t stand the apple on the back of a Macbook, and I loathe the bevelled Dell logo on the back of my i7, so I greatly respect this choice by PINE64 to keep the chassis clean, allowing me to either go for that sleek, professional look, or plaster it in stickers to my heart’s content.

The Pinebook Pro has enough power to handle HD video beautifully, and to top off the viewing experience, it has built-in Bluetooth 4.2 to connect your headphones or other Bluetooth device.

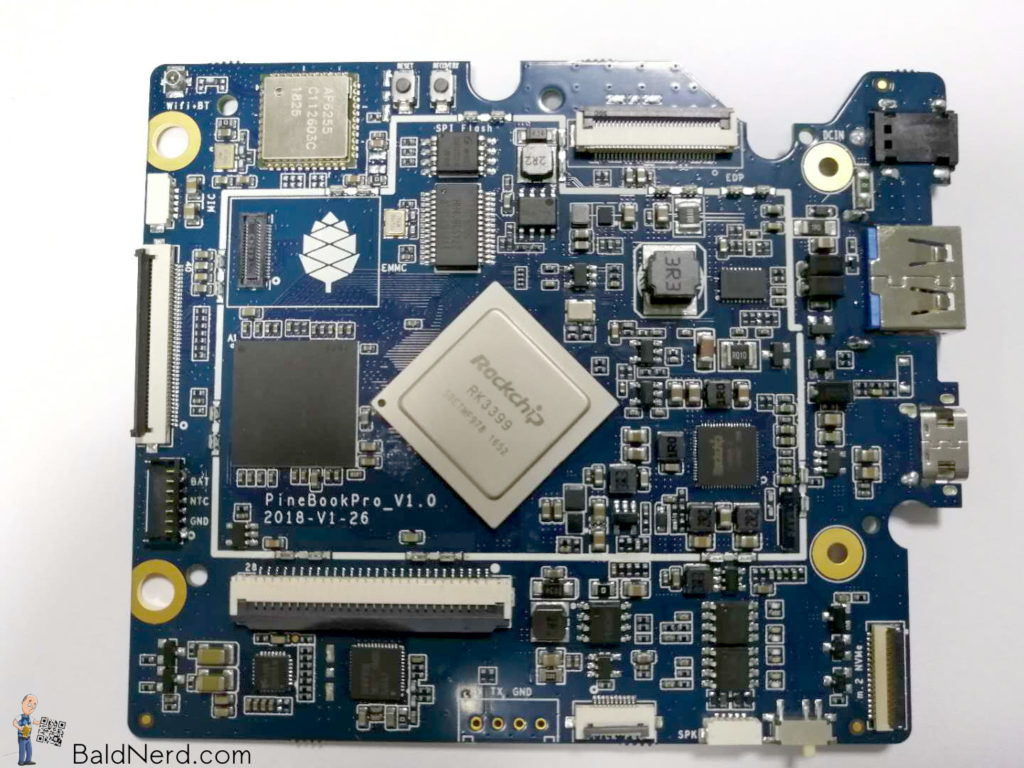
Digging deeper into the system, like the RockPro64, we’ve got a Rockchip RK3399 Hexacore SOC, which contains the Dual Cortex-A72 + Quad Cortex-A53 64-bit CPU. The Pinebook Pro has 4 GB of LPDDR4 RAM.

The Pinebook Pro also features a PCIe x4 slot which will allow the addition of a m.2 NVMe SSD.

We also find a MicroSD card slot, audio output, USB 3.0 and 2.0 ports, 802.11ac WiFi, a 2 MP forward-facing webcam plus built in speakers and a microphone in the Pinebook Pro.

PINE64 have included a barrel jack for charging, which I personally prefer. However, they’ve again heard the cry of the community and made it so you can also charge the Pinebook Pro via the USB-C port.

According to Erecinski, the original Pinebook is not going anywhere. He also shares that PINE64 will be offering an optional upgrade kit for users to be able to upgrade their standard Pinebook to a more Pro-like model.

PINE64 is working on ways to bring down the cost of shipping for the Pinebook Pro, and in the process they hope those improvements will trickle down to the regular Pinebook line as well.

Erecinski says the target release for the Pinebook Pro is the second half of 2019. “The first prototype is here. We’ve got three prototypes. They will go to three key projects that we’re working with.” That is to say, developers of the coming operating systems for the Pinebook Pro. “We want to have at least two or three operating systems in place for when it rolls out,” says Erecinski. “We’re also going to have a scheme where other developers will get their units a bit earlier, ahead of users so they can port their OS to the Pinebook Pro as well.”

Pinebook Pro System Specifications

  • 14″ 1080p IPS LCD panel
  • 64GB of eMMC storage
  • Black magnesium alloy body
  • MicroSD card slot
  • Digital video output via USB-C
  • Audio aux out / UART
  • USB 3.0 and USB 2.0 ports
  • 802.11ac WiFi
  • Bluetooth 4.2
  • 4GB of LPDDR4 RAM
  • Charging via barrel port or USB-C
  • Rockchip RK3399 Hexacore SOC
  • 2mpx front-facing camera
  • Microphone
  • Speakers
  • Slim and slick design with minimal branding
  • PCIe x4 that can take a m.2 NVMe SSD
  • Price: aiming at $199

The Echo Dot 3 after a few weeks usage.

Surely it comes as no surprise after reading my previous article about the Google Home Mini vs. Amazon Echo Dot 3, that the Google Home Mini is sitting, unplugged, on a table in my studio. Yet the Amazon Echo Dot 3 sits on a milk can in my kitchen at home, getting daily use.

After serveral weeks of day-to-day interaction with Alexa, here is an update on how I feel about it.

Christmas Music Was Awesome

This past Christmas season, our house was filled with all kinds of Christmas music. When one type got tired, we’d just say “Alexa, play Christmas music from the 1940s” and were surprised it would oblige perfectly. Even my mother in law, when visiting for Christmas dinner, was dancing with my niece in the kitchen to some crooner Christmas music thanks to Alexa.

I Plugged The Power Bar Into The Christmas Tree

It was kind of neat to be able to say “Alexa, turn on the Christmas tree.” It only took 5 minutes to configure, and worked perfectly.

We Got Tired of Saying “Alexa” – So We Changed Its Name

Our Amazon Echo Dot 3 now responds to the name “Computer”. It felt right, being a Trekkie family. “Computer – what’s the weather forecast?” and “Computer – what’s the date, the date?!” are commonly heard in our home now. It makes the Echo Dot 3 more fun. I didn’t have to open the app or figure it out: I just said “Alexa, change your name to Computer” and it responded with “Okay, you can call me Computer on this device in a few seconds.”

I tried doing the same on the Google Home Mini, and it made some joke about the tides, positioning of the moon, being February 29th, and so-on. It was a long winded way of the Google Home Mini saying “I can’t change my name” and rather than being funny, it just reiterated the feeling that Amazon’s product is far superior. When they finally add the feature to change the name of the Google Home Mini, I’m going to change it to Alexa just to be ironic.

Note: The Amazon Echo Dot 3 does not allow you to change the name to anything you like. These are the options they provide: Alexa, Amazon, Echo, Computer.

I Made Alexa’s Voice British

Alexa’s voice sounds kinda cliche and overdone. I wanted it to sound more sophisticated. So I changed the region code to the UK within the app. Immediately, it started speaking with a nice British accent, and the jokes it told were obviously more UK-centric humor. I liked that. The one caveat was that unfortunately, now it no longer gave accurate responses to local requests. “What time does Starbucks open” would give me a result for thousands of miles away.

The novelty wore off and functionality overruled the pleasantry of the British accent, so the region was reset to Canadian English. I wish you could change the accent without changing the region.

SHOCK OF SHOCKS – The Echo Dot 3 Connects to ANY Bluetooth Speaker

At one point, I was wanting the music to fill the house more than the little (yet impressive) speaker could do. I opened the Device Settings for the Echo Dot device in my Alexa app, and there is an option for “Bluetooth Devices”. Clicking that I was easily able to pair a new device. My TV’s soundbar (which I had switched to Bluetooth Pairing mode) was shown, and I was able to easily connect it. Now, any time I want “bigger” sound, I just say “Computer, connect to my speaker”.

I have since also connected a second Bluetooth speaker; my little portable one. Now I can connect to that and move the sound from Alexa to any room in the house, wirelessly and easily.

Alexa Plays My Music Library – And It’s SO Easy

Having done a quick search for how to add my own music to Alexa, as I didn’t want to have to pay $8 per month to have access to Amazon Music Premium, I was disappointed at first to see that while the Google Home Mini apparently supports uploading your own music and playing it back on your device, Alexa does not. Amazon did have that service, but they canceled it last year.

But uploading my music redundantly to a server in the cloud is just that: redundant. I already have a media server: Plex Media Server. It already has all my music on it, and whenever I rip new CDs (like all the ones we bought for Christmas gifts) they automatically go into the Plex media library. It’s organized the way I want it, and the files are tagged the way we like. We have playlists, categories, and so-on. So why re-create that on an online service anyways?

I began to think Google’s way of doing it is stupid.

I changed my search query to plex media server alexa, and low and behold, a skill!

I opened my Alexa app on my phone, jumped over to skills, and added it promptly! During that process it asked for my Plex credentials to connect Alexa to my account. That was it! Too easy.

“Computer, open Plex” was then greeted with a disappointing response. Something about my server ‘Unraid’ could not be accessed because I need to enable remote access. Okay, it knows the name of my server – so that means something is working. I brought up Plex in my web browser and went to Settings -> Server -> Remote Access, and clicked “Enable Remote Access.” Could it be that simple?

“Computer, open Plex.” was now greeted with “What would you like to do? You can say things like ‘suggest something to watch’ or ‘play some music’.”

I bought my wife a 6-CD set called Classical 101, which I ripped last week, so it should be on plex. “Computer – ask Plex to play the album Classical 101” and sure enough, we’re now enjoying the set playing from the Echo Dot 3 in the kitchen!

There is a wonderful cheat-sheet of Plex commands for Alexa provided at https://support.plex.tv/articles/236324808-alexa-voice-commands/

My Current View

It’s been less than a month since I tested both the Google Home Mini and the Amazon Echo Dot 3. I am really impressed with all I’m able to do with the Echo Dot, and I actually find I’m using it for day-to-day tasks more and more. When I cook dinner, it is so great to be able to say “Computer, remind me to flip the chicken in 20 minutes”. I’ll look at that, and other features like the impressive shopping list functionality in my next post.

The Amazon Echo Dot 3 has me feeling really happy with the purchase. On the contrary, the Google Home Mini, I’ll probably use pretty much only for development, just so I can write skills to share with our community. But I don’t like it, having used both. I’ve actually contemplated buying another Echo Dot 3 for the studio, and maybe even one for work.