send_packet6: Operation not permitted

The Problem

My syslog shows:

dhclient[24931]: send_packet6: Operation not permitted
dhclient[24931]: dhc6: send_packet6() sent -1 of 56 bytes
dhclient[367]: XMT: Solicit on eth0, interval 122930ms.
dhclient[367]: send_packet6: Operation not permitted
dhclient[367]: dhc6: send_packet6() sent -1 of 56 bytes

The Cause

DHCP for IPv6 uses different ports than IPv4, so your IPTABLES / CSF firewall may need to have its rules adjusted if you start using IPv6.

The Solution

Set your firewall to allow UDP in/out for:
IPv4: 67,68
IPv6: 546,547

That’s it. The error is gone.

Robbie // The Bald Nerd

Why I want to switch to DaVinci Resolve 15

There’s one thing–only one thing–that keeps me stuck on Windows 10 on my laptop, and that’s my need to edit video for the Category5 TV Network. It has to be pro, and Linux has traditionally lagged far behind in its available offerings in comparison to Mac or Windows when it comes to video editing.

I’ve used Cyberlink PowerDirector for years. I know, it’s a cheap application and professionals will laugh at me. But fact is, it works very well, and has all the features I need to make a professional looking broadcast.

But it only works on Windows, and so I’ve been stuck on Windows.

I’ve been watching the progress of DaVinci Resolve from BlackMagic since it was first released, and even tried getting it going a few times, but it’s always been unstable on Linux. So I’m still stuck. But seeing video tutorials about it, and watching the changelogs, it really looks like it could be the video editor of Linux.

I installed LMDE 3 to see if it would take DaVinci Resolve, and I see BlackMagic has still not made any strides toward improving Linux support. The installer sucks. The software depends on old libraries, yet doesn’t install them. It’s trash, really. A sad state to be sure.

I’m going to do some tinkering, try moving over to Linux Mint to see if the Ubuntu base helps things (ie., proprietary NVIDIA drivers will probably be a bit newer), convert Resolve’s installer to a deb pack, and try installing it there. I’ll probably go through a few distros just trying to see where I can get Resolve working stable. I have v14 working on our family desktop computer running Ubuntu, but it’s unstable. Hoping for better results with Resolve 15.

So beyond the Windows requirement I’m currently under, there are a few things I absolutely require out of my video editor, and these are things that have prevented me from being able to move to a Linux editor in the past, but DaVinci Resolve appears to meet the requirements.

ProRes 4:2:2 editing. Yeah, I need that now that we’re recording to an Atomos Ninja Flame. Cyberlink PowerDirector handles ProRes files like a boss. I know DaVinci Resolve will do the same.

When I produce shows like New Every Day, I badly need multi-cam editing functionality in my editor. We only have one camera on that set, but because it is 4K we punch in to cut it into 3 different camera shots. In Cyberlink Power Director, I assign each of these “cameras” (punched-in shots) to keyboard keys, and simply press the key to change cameras. It automatically creates the edits on the timeline, and saves me a TON of editing work, while making the show appear like it has 3 cameras. I’ve even thought about getting a second StreamDeck (or even a mini) just for multi-cam editing.

Multi-Cam Editing looks just as good, and possibly better in DaVinci Resolve than it is in Cyberlink PowerDirector. Though this video doesn’t mention anything about keyboard shortcuts, I can’t imagine you actually have to use your mouse to switch shots. If it does not have keyboard-based switching, I’d have to give this one to Cyberlink PowerDirector, but it’s close enough to make the transition to DaVinci Resolve work.

Dynamic Zoom is just as easy in DaVinci Resolve as it is in Cyberlink PowerDirector. I use this heavily to give the punch-in shots some movement as if there’s someone operating the faux camera.

So there are a few reasons I think DaVinci Resolve might be ready, and might be able to help me transition fully to Linux on my laptop. As long as it is stable. Here’s hoping!

[Update]

Linux Mint 19 took DaVinci Resolve like a champ! Just had to install libssl-dev and ocl-icd-opencl-dev with apt, and it loaded up just fine! No other tricks or gimmicks, and no having to create symlinks to libraries!

Obviously I had to active the NVIDIA drivers, and Resolve warns me performance may suffer on my old lappy, but I’m running!

DaVinci Resolve 15 running on Linux Mint 19

[Update 2]

Okay, so it’s running. However, even with gstreamer-plugins, vlc, and Mint’s multimedia codecs installed, Resolve only sees the PCM audio for MP4 files shot on the Sony FDR-AX53, which are XAVC.

XAVC-encoded video from the Sony FDR-AX53 is only showing as PCM Audio in DaVinci Resolve 15 on Linux Mint 19

At the same time, there is no audio coming out of the speakers, though DaVinci Resolve 15 is the first version to include native audio support (using ALSA) in Linux.

So I’ll try converting the video to ProRes using the format settings I see in mediainfo C0001.MP4:

apt install ffmpeg
ffmpeg -i C0001.MP4 -c:v prores -vf "scale=3840:2160,fps=30000/1001,format=yuv422p" -b:v 110M -c:a pcm_s16le output.mov

I go to try it to see if it worked, and immediately start to think my old laptop might not be up to the task.

On the plus side, converting the video to ProRes worked (having rebooted, I can load it):

And there is sound now that the video has been converted!

But, it seems a sad fact that my computer is not up to the requirements to do this. Yet it works perfectly in Windows 10 with Cyberlink PowerDirector. So disappointing.

I’m going to continue tinkering with settings to see if I can squeeze some life out of this old girl.

NTP on Debian reporting 95 years in the future – Part 2: The Time Traveler

If you haven’t read part 1 yet, make sure you start there.

This issue has really intrigued me.

Setting the date manually fails:

root@nems:/var/log# date
Mon Aug 28 06:39:22 EDT 2113
root@nems:/var/log# date -s "2018-07-05"
date: cannot set date: Invalid argument
Thu Jul  5 00:00:00 EDT 2018

Invalid argument? Maybe it wants me to set the time too?

root@nems:/var/log# date -s "2018-07-05 20:13:01"
date: cannot set date: Invalid argument
Thu Jul  5 20:13:01 EDT 2018

Nope, that made no difference.

Well, what does my hardware clock say (since the Pine A64+ has one)?

root@nems:/var/log# hwclock
2018-07-05 20:13:10.747892-0400

Oh yay, that looks better! Let’s use that! Obviously the system knows the date and time…

root@nems:/var/log# date -s "$(hwclock)"
date: cannot set date: Invalid argument
Thu Jul  5 20:14:20 EDT 2018

Oh, COME ON!

Maybe I’ll try the long-form command…

root@nems:/var/log# date --set="$(hwclock)"
date: cannot set date: Invalid argument
Thu Jul  5 20:15:49 EDT 2018

Nope. Same result. Ach!

This is looking a lot like an old kernel bug I recall from the late 2000’s. Better check what kernel I’m running…

root@nems:/var/log# uname -a
Linux nems 4.14.26 #1 SMP Sun Mar 11 16:34:42 UTC 2018 aarch64 GNU/Linux

If I had hair…

Just to be sure, let’s reconfigure my timezone config:

root@nems:/var/log# dpkg-reconfigure tzdata

Current default time zone: 'America/New_York'
Local time is now:      Mon Aug 28 06:47:54 EDT 2113.
Universal Time is now:  Mon Aug 28 10:47:54 UTC 2113.

root@nems:/var/log# hwclock
2018-07-05 20:19:51.275648-0400

Okay, so let me get this straight… it’s August 28, 2113. But it’s July 5, 2018 according to the RTC.

Think, Robbie, think.

I did a quick grep through the /var/log folder for anything talking about ntp, and interestingly, I find this at the top of dpkg.log:

2018-07-04 08:59:23 startup archives unpack
2018-07-04 08:59:24 install ntpstat:arm64 <none> 0.0.0.1-1+b1
2018-07-04 08:59:24 status half-installed ntpstat:arm64 0.0.0.1-1+b1
2018-07-04 08:59:24 status unpacked ntpstat:arm64 0.0.0.1-1+b1
2018-07-04 08:59:24 startup packages configure
2018-07-04 08:59:24 configure ntpstat:arm64 0.0.0.1-1+b1 <none>
2018-07-04 08:59:24 status unpacked ntpstat:arm64 0.0.0.1-1+b1
2018-07-04 08:59:24 status half-configured ntpstat:arm64 0.0.0.1-1+b1
2018-07-04 08:59:24 status installed ntpstat:arm64 0.0.0.1-1+b1
2113-08-27 19:31:23 startup archives unpack
2113-08-27 19:31:23 install ntpdate:arm64 <none> 1:4.2.8p10+dfsg-3+deb9u2
2113-08-27 19:31:23 status half-installed ntpdate:arm64 1:4.2.8p10+dfsg-3+deb9u2
2113-08-27 19:31:24 status unpacked ntpdate:arm64 1:4.2.8p10+dfsg-3+deb9u2
2113-08-27 19:31:24 startup packages configure

So on first boot, the system had the date correct: July 4, 2018. The time is off by a couple hours however (it was perhaps 6am when I flashed and fired up the system and then left for work).

What’s interesting here is that the typical ntp startup tasks unpack, install and run, but then after the package is installed (a presumably automated process since I didn’t do it!) the date suddenly changes to August 27, 2113.

Being a Raspberry Pi user all my SBC life, I’m honestly impressed that the Pine A64+ has a built-in RTC… but nowhere in the specs do I see that it also includes a corresponding flux capacitor, so I must presume the jump through time is more likely a glitch in the matrix.

I’m afraid to reboot.

What’s Next? Read Part 3:

NTP on Debian reporting 95 years in the future – Part 3: Community

NTP on Debian reporting 95 years in the future – Part 1

Here’s one for the “I’d pull out my hair if I had some” files…

I have a wee SBC (a Pine A64+) I’m porting NEMS to, and everything was sweet for a day… working fine, all looks good. So I left it running.

Next day, while the system clock shows the correct date and time, the UTC and Local time are off by 95 years!

root@nems:/home/nemsadmin# systemctl status ntp
● ntp.service - LSB: Start NTP daemon
   Loaded: loaded (/etc/init.d/ntp; generated; vendor preset: enabled)
   Active: active (exited) since Sun 2113-08-27 20:46:11 EDT; 1min 37s ago
     Docs: man:systemd-sysv-generator(8)
  Process: 1823 ExecStop=/etc/init.d/ntp stop (code=exited, status=0/SUCCE
  Process: 1834 ExecStart=/etc/init.d/ntp start (code=exited, status=0/SUC
    Tasks: 0 (limit: 4915)
   CGroup: /system.slice/ntp.service

Aug 27 20:46:16 nems ntpd[1844]: Soliciting pool server 209.115.181.102
Aug 27 20:46:17 nems ntpd[1844]: Soliciting pool server 144.217.245.233
Aug 27 20:46:17 nems ntpd[1844]: Soliciting pool server 209.115.181.107
Aug 27 20:46:18 nems ntpd[1844]: Soliciting pool server 198.100.148.213
Aug 27 20:46:18 nems ntpd[1844]: Soliciting pool server 2607:4100:2:ff::2
Aug 27 20:46:22 nems ntpd[1844]: step-systime: Invalid argument
Aug 27 20:46:22 nems ntpd[1844]: receive: Unexpected origin timestamp 0x91

root@nems:/home/nemsadmin# timedatectl status
      Local time: Sun 2113-08-27 20:47:55 EDT
  Universal time: Mon 2113-08-28 00:47:55 UTC
        RTC time: Thu 2018-07-05 14:20:36
       Time zone: America/New_York (EDT, -0400)
 Network time on: yes
NTP synchronized: no
 RTC in local TZ: no

root@nems:/home/nemsadmin# ntpdate -d 0.debian.pool.ntp.org | sed -n '$s/.*offset //p'
1292443255.246538 sec

Now, I admit, it’s nice seeing a NEMS server that’s been up for that long 😛 but it’s very curious.

Logging into NEMS Linux, I find another oddity…Apparently my last login was in 1977.

Here is a picture of how that might have looked:

I’m pretty confident that my little Pine A64+ has more power and capacity than the supercomputer shown. Chances are good it also cost a bit less.

So it’s time to start digging… where did NTP get this ridiculous 1292443255.246538 second offset from, and why? And how to correct it?

What’s next? Read Part 2:

NTP on Debian reporting 95 years in the future – Part 2: The Time Traveler

Automatically Deduplicating Data on Debian Linux

Deduplication is the process by which a filesystem (or application) stores data by first comparing data blocks within the data and then only storing one copy of matching data blocks. By doing this, the files require significantly less space on the storage medium.

A good example (just for the sake of understanding) would be WordPress. Let’s say you have a web server with 10 WordPress sites. The WordPress source code in this example is 30 MB on its own. Your server will be storing 300 MB (10x 30 MB). By storing this on a deduplicating filesystem, it’ll be the original 30 MB plus a little overhead for the deduplication data… so let’s say for the sake of ease, your server will be storing just 31 MB for exactly the same data.

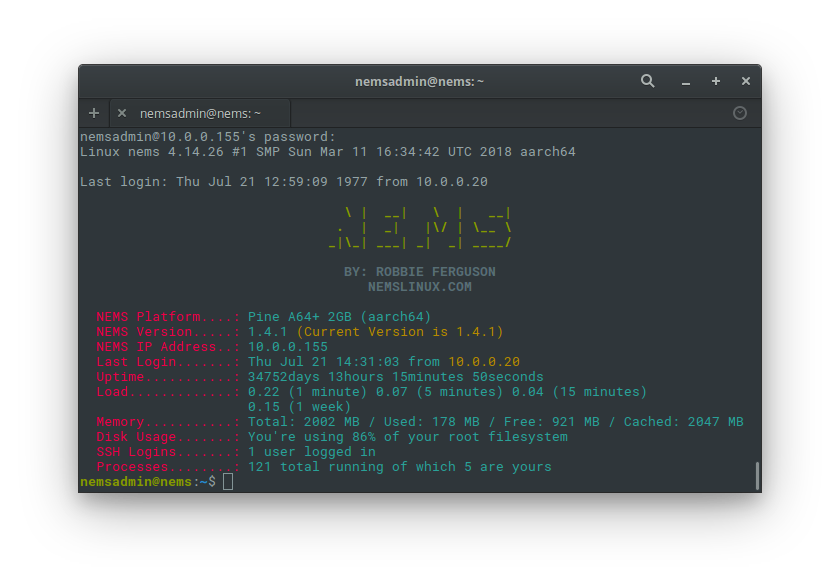
These are small numbers. But I recently opened an off-site backup service for NEMS Linux, and I need to be able to store daily backups for its users. Guess what? From day-to-day, a significant portion of those backups are very, very similar. Config files don’t generally change much from day-to-day, most days. So why store them in such a way that they take up 30x the space? Deduplicating is going to save me a ton of storage space.

I’ve been reading up on some deduplication options. My first go-to was btrfs, but it looks like they’re not quite ready yet, with inline deduplication residing only out of tree. I feel like when that feature is implemented in stable, btrfs will be my go-to… but for now, I need to find an alternate solution.

Lessfs is another one I peeked at, but once I noticed their “official” web site was offline, and distribution is done through Sourceforge, I moved on pretty quickly as it seems pretty obvious that either it’s a dead project or at least not a well-supported one.

Then I got looking at OpenDedup’s SDFS, which is a volume-based deduping filesystem, which sounds ideal for my use case, for now. I won’t hold the fact that it is Java-based against it just now as the functionality sounds perfect. Plus SDFS appears well-supported and professional in its presentation, which gives me hope for its future.

I’m going to add some more memory to my little server to accommodate the RAM requirements. Make sure your system has adequate RAM… SDFS likes to eat memory for breakfast. “The SDFS Filesystem itself uses about 3GB of RAM for internal processing and caching. For hash table caching and chunk storaged kernel memory is used. It is advisable to have enough memory to store the entire hashtable so that SDFS does not have to scan swap space or the file system to lookup hashes. To calculate memory requirements keep in mind that each stored chunk takes up approximately 256 MB of RAM per 1 TB of unique storage.” [Admin Guide]

If you’re not using Debian, check out their Quickstart Guide.

Installation of SDFS and its dependencies on my Debian system (would also work for any other Debian-based system like Ubuntu, as long as you are root user):

apt -y install libxml2-utils
wget -O /tmp/sdfs.deb http://www.opendedup.org/downloads/sdfs-latest.deb
dpkg -i /tmp/sdfs.deb

Next up, we need to increase the limit of how many files can be opened at once… again, as the root user:

echo "* hard nofile 65535" >> /etc/security/limits.conf
echo "* soft nofile 65535" >> /etc/security/limits.conf

Next up, I need to create the volume itself, but I want to be specific about where it is stored. In this example I will call the volume “myvolume” and I will store it in a folder called raw_volume in my home folder… this way I know not to touch it (as it is raw):

mkfs.sdfs --hash-type=VARIABLE_MURMUR3 --volume-name=myvolume --volume-capacity=100GB --base-path=/home/robbie/raw_volume

Once created, if you’d like to see the status, type:

sdfscli --volume-info

…and you can view/edit the configuration in the file /etc/sdfs/myvolume-volume-cfg.xml where myvolume is whatever you named yours with –volume-name above.

The reason I’m specifying to store in my home folder is because it will then be part of my backup set (without having to manually add it) and also because my home folder is on a different, bigger drive than the /opt folder, which is where SDFS would default to.

You’ll also notice in the above command I’ve set the capacity to 100GB. It won’t actually take this much space on my drive right now. That is the maximum I’m allowing the volume to become. You can change that to anything you like, to suit your need. On the disk itself (in /home/robbie/raw_volume by my example) the SDFS volume will actually only take up the amount of space of the deduplicated data. If you ever need to make the volume bigger, you can do so by typing the following with the volume unmounted: sdfscli –expandvolume 512GB

Also, since this is a local filesystem, I’ve specified to use a variable block size, which could reduce the amount of space and improve the deduplication.

Now I need to create the mountpoint and mount the SDFS volume so I can start writing data to it:

mkdir /home/robbie/backup
chattr +i /home/robbie/backup

Now let’s prepare the mount.sdfs command:

nano /sbin/mount.sdfs

Scroll to the end of the file and remove “-Xmx$MEMORY$MU”, and edit “-Xms$MEMORY$MU” to instead read “-Xms1M”.

So my final command looks like this:

LD_PRELOAD="${BASEPATH}/bin/libfuse.so.2" $EXEC -server -outfile '&1' -errfile '&2' -Djava.library.path=${BASEPATH}/bin/ -home ${BASEPATH}/bin/jre -Dorg.apache.commons.logging.Log=fuse.logging.FuseLog -Xss2m \
 -wait 99999999999 -Dfuse.logging.level=INFO -Dfile.encoding=UTF-8 -Xms1M \
-XX:+DisableExplicitGC -pidfile /var/run/$PF -XX:+UseG1GC -Djava.awt.headless=true \
 -cp ${BASEPATH}/lib/* fuse.SDFS.MountSDFS "$@"

Then, mount it to test:

mount.sdfs myvolume /home/robbie/backup

Try writing some data to the the mountpoint. If all went well, all should work and automatically dedupe. As I write data to /home/robbie/backup, it is automatically deduplicated to save space!

Next up, adding it to fstab!

If all went well, unmount it and make it so it automounts.

umount /home/robbie/backup

Despite what some people are saying online, yes, you can indeed mount sdfs filesystems using fstab! It’s a fuse-based filesystem! #facepalm

Here’s how I added it to my fstab:

myvolume /home/robbie/backup sdfs defaults,noatime,rw,x-systemd.device-timeout=5 0 0

All is working great, but it’ll be most interesting to see what begins happening once I exceed ~1 GB storage and deduplication starts doing its thing.

The Results

To see the difference in usage, I like simply using this command:

ls -lskh

This will output something along the lines of this:
47K -rw-r–r– 1 root root 1.6M Feb 2 10:02 test2.txt
1.5M -rw-r–r– 1 root root 1.6M Feb 2 09:55 test1.txt

You’ll notice I’ve colorized the filesizes. The first set (indicated in orange) represents the actual usage on disk thanks to deduplication. The second set (blue) is the actual filesize.

I even noted that copying multiple copies of the same file, the “extra” copies showed a use on disk size of 0B! Yes, the impact is so small it didn’t even register! Brilliant.

Backup a Linux machine with LVM Snapshots and rdiff-backup

Here is the completed script I wrote on Episode 461. Make sure you check out the full episode for details on how to make this work for you.

#!/bin/sh
/sbin/lvcreate -L10G -s -n lvm_snapshot /dev/ubuntu-mate-vg/root
/bin/mount /dev/ubuntu-mate-vg/lvm_snapshot /mnt/snapshot

/usr/bin/rdiff-backup -v5 --print-statistics \
  --exclude /mnt/backup/ \
  --include /mnt/snapshot/home/ \
  --include /mnt/snapshot/etc/fstab \
  --include /mnt/snapshot/var/log/ \
  --exclude '**' \
  / \
  /mnt/backup/

/bin/umount /mnt/snapshot
/sbin/lvremove -f /dev/ubuntu-mate-vg/lvm_snapshot

And of course, here is the episode:

Plex Media Server on a Raspberry Pi 3

I wanted to document the instructions shared on Episode 459 to supplement the episode.

On the show, Jeff and I demonstrated how to turn a Raspberry Pi 3 with Raspbian Jessie into a Plex Media Server, giving you the chance to stream your entire video and music library to all your devices.

I won’t get into the full details here, since this is only a supplement to give you some copy-and-paste instructions, but I’d encourage you to watch the video.

What You Need

  1. A Raspberry Pi 3 Micro Computer. Please consider purchasing it through our store to support what we do: https://cat5.tv/pi
  2. Raspbian Jessie – A free download from raspberrypi.org
  3. Obvious stuff like a good MicroSD card, Ethernet cable (preferred as opposed to wifi), keyboard and mouse… etc.

How to Do The Do
Updated February 7, 2018
due to some evolution of the process. These steps are more current than those used in the video (a new video will be coming soon).

  1. In terminal, upgrade your distro to the latest and greatest.
    sudo apt update
    sudo apt upgrade
    sudo apt dist-upgrade
  2. Reboot the Pi.
    sudo reboot
  3. Add the ability for apt to use https repositories. If you already have this, it’ll report as “already the current version” and you can move on.
    sudo apt install apt-transport-https
  4. Add the Plex Media Server repository provided by Universität Leipzig.
    echo "deb https://dev2day.de/pms/ jessie main" | sudo tee /etc/apt/sources.list.d/pms.list
  5. Add the GPG key for the repository.
    This is the “easy” method (which didn’t work for us because my keyboard was in some weird mode with no pipe character):

    wget -O - https://dev2day.de/pms/dev2day-pms.gpg.key | sudo apt-key add -

    Alternate method (which I had to use on the show since I didn’t have a pipe character… I’ve cleaned it up a bit since the live show so it is cleaner since it was an unexpected twist and I kinda made it seem more confusing than it should):

    wget -O /tmp/pms.key https://dev2day.de/pms/dev2day-pms.gpg.key
    sudo apt-key add /tmp/pms.key
  6. Update apt.
    sudo apt update
  7. Install Plex Media Server.
    sudo apt install plexmediaserver-installer
  8. Create the default config file so Plex knows what user to operate under.
    echo "PLEX_MEDIA_SERVER_USER=pi" | sudo tee -a /etc/default/plexmediaserver
    sudo chown -R pi:pi /var/lib/plexmediaserver
    sudo service plexmediaserver restart

    (Thanks to Steve for submitting this additional step)

  9. Reboot one final time.
    sudo reboot

And there you have it! All the commands we used to get Plex Media Server installed on a Raspberry Pi 3 in a nice clean blog post  🙂

Optional: Use External Storage for Media

From there, we plugged in the USB flash drive (don’t do it! Use a proper external hard drive–this was only a demonstration) and after it mounted we used the following command to see its /dev assignment:

sudo mount

Since our drive was /dev/sda1, and of the filesystem type “fat32” this is what I did to make it work as the media library for Plex Media Server:

sudo nano /etc/fstab

and add the following line:

/dev/sda1 /mnt/library fatfs defaults 0 0

I then created the mountpoint:

sudo mkdir /mnt/library

and made it so it can only be written to if mounted:

sudo chattr +i /mnt/library

and finally, mounted the drive:

sudo mount -a

From there, I could easily add folders on my external drive to Plex using the web interface, which you’ll find on Port 32400 in the /web subfolder on your Pi.

To get my IP address, I brought up the terminal on the Pi and typed:

sudo ifconfig

That showed the IP address of my Pi under “Ethernet”… 192.168.0.105

So to open Plex in my browser, from my computer I entered:

192.168.0.105:32400/web

The IP address will most likely be different for yours, and you might even want to set it up as a static IP. Easiest way to do that would be to use your router’s DHCP reservations to hard-set the Pi to something outside your DHCP pool. For me, that’d be 192.168.0.5 or something like that, since the pool seemingly starts at 100.

Good luck, and if you have any questions or comments, please leave them below. Don’t forget, if this has helped you out, or if you just love supporting nice guys who wanna keep giving knowledge for free, please head over to our Patreon page, or throw a bit in the tip jar. Thanks!

NEMS Linux – Nagios Enterprise Monitoring Server for Raspberry Pi 3

NEMS Linux – Nagios Enterprise Monitoring Server for Raspberry Pi

Important Note: NEMS started as a small project here on my blog, but since has grown into a full-fledged distro! The blog therefore is here for historical purposes, but for the most current information, please visit the NEMS Linux web site: nemslinux.com


NEMS is a modern pre-configured, customized and ready-to-deploy Nagios Core image designed to run on the Raspberry Pi 3 micro computer. At its core it is a lightweight Debian Stretch deployment optimized for performance, reliability and ease of use.

NEMS is free to download, deploy, and use. Its development however is supported by its community of users. Please consider contributing if you can.

Please Note: NEMS is a very ambitious project, and I’m just one guy. Please consider throwing a little gift in my Tip Jar if you find NEMS saves you time or money. Thanks!

Support
[NEMS Documentation]
[NEMS Community Forum]
[NEMS User Comments]

Index

NEMS 1.1 Featured on Category5 Technology TV


If you like NEMS, please donate: donate.category5.tv

The Out-Of-The-Box NEMS Experience:

Buy The Needed Hardware

Raspberry Pi 3 Nagios ServerRaspberry Pi 3 are very affordable, and using our Micro SD image, you simply buy the device, “burn” the image to the Micro SD card, and boot it up.

Here’s our link to buy the device you’ll need, complete with the Micro SD card, a power adapter, a good solid case, and more: shop.category5.tv

Please buy it through that link, or let me know if you need a customized link to a different model. We get a small percentage of the sale, and it helps to make it possible to offer this as a free download.

Who Creates NEMS:
Robbie Ferguson is the host of Category5 Technology TV. He’s the kind of guy who when he figures stuff out, he likes to share it with others. That’s part of what makes his show so popular, but also what makes NEMS possible.

Support What I Do:
This project is a part of something much bigger than itself, and we’re all volunteers. Please see our Patreon page for information about our network.
– Please support us by simply purchasing your Raspberry Pi at https://cat5.tv/pi
– We have some support links on the NEMS menu, such as buying from Amazon using our partner link. Please use these every time you use those stores. A small percentage of your purchase will go toward our projects.
– Your donations are VERY MUCH appreciated – https://donate.category5.tv – Please consider how many hours (and hours) of work this project has saved you, and how much you’ll save on hardware and even electrical costs as you consider contributing
– Our network also has a Patreon page – Please consider becoming a patron – https://patreon.com/Category5

Make it so mountpoint can’t be written to if not mounted.

Have you ever accidentally saved files to a Linux mountpoint when the drive wasn’t mounted, and then couldn’t mount the drive thereafter? Or worse, had a backup run when the backup drive wasn’t mounted, only to fill your filesystem and crash the server?

These problems can be avoided by simply making your mountpoint immutable! What this means is, your mountpoint (the folder itself) cannot be written to. However, even as an immutable folder, it can be mounted to, and the filesystem of the mounted drive then controls the permissions of the folders therein.

It’s a simple Linux command. We’ll pretend our mountpoint is simply /mountpoint. Here’s all you have to do:

chattr +i /mountpoint

Brilliant! And oh, so simple.

Here’s a sample of what happens when I do this as root. Note that ‘mymountpoint’ is setup for me in my /etc/fstab file so it normally auto-mounts.

root@server:/# umount mymountpoint
root@server:/# chattr +i mymountpoint
root@server:/# cd mymountpoint
root@server:/mymountpoint# touch test
touch: cannot touch `test': Permission denied
root@server:/mymountpoint# mount -a
root@server:/mymountpoint# touch test
root@server:/mymountpoint#

Enjoy that little tidbit!

As a side note, you might want to also get a notification if your drive isn’t mounted… so you could use the mountpoint command to send you an email if there’s a problem. Just add something like this to your backup script:

mountpoint -q /mymountpoint || mail -s "/mountpoint is not mounted for the backup" [email protected]

That simply checks if /mountpoint is a mounted mountpoint. If yes, it does nothing. If no, it will send you an email.

-Robbie