
In some previous iterations of the ESET management virtual appliance (ie., ESET Remote Administrator) the operating system would update itself. However, with the new ESET Security Management Center virtual appliance, there is no such task scheduled.
After some time, this will result in the ESMC Security Notification:
Operating system is not up to date
In today’s ESMC exercise, we’ll achieve:
- Learn to create a client task,
- Learn to schedule a client task to run on a schedule,
- Learn to initiate a client task immediately.
- And of course, we’ll update our virtual appliance’s OS and get rid of that nasty warning!
Here are the steps to follow. Pay attention along the way so you understand what’s happening. I don’t need to explain it here, since it will be clear on screen as you follow the steps. But by doing this, you will better understand how ESMC’s client tasks operate, and will resolve this issue immediately.
TIP: Note that in the second section (where we run the task immediately) we do not have to create a new client task. Once a client task is created once, you can re-use it (run on) as many times as you like. Similarly, if you create say, a task to install ESET Endpoint Security on Windows Workstations, you can later “Run on” the new laptop you got, without having to create a new Client Task (resulting in redundant client tasks in your list).
Here are the steps to fixing the ESET Security Management Center Operating System is Not Up To Date issue:
- Click Client Tasks
- Click New at the bottom.
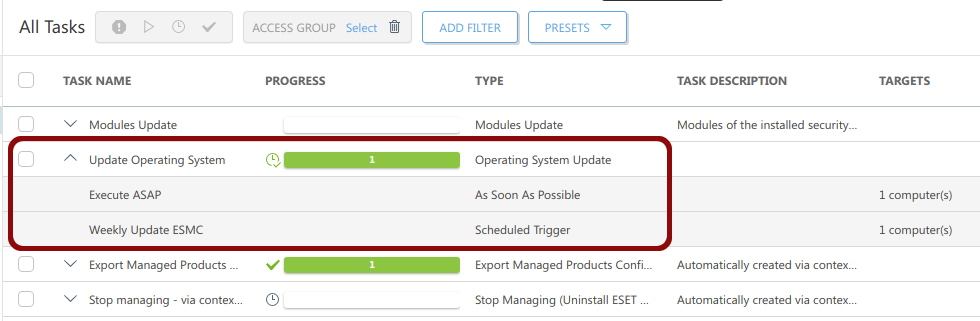
- Name the task something like “Update Operating System”
- Set Task Category to “Operating System”
- Choose task “Operating System Update”.
- Press Continue (not Finish)
- Check all 3 boxes.
- Click Finish.
- Click Create Trigger.
- Name the trigger “Weekly Update ESMC” or something to that effect.
- Click Continue (not Finish).
- Click Add Computer and put a checkbox next to emsc.local, and press OK
- Press Continue (not Finish).
- Change “Scheduled” to “Weekly” and set which day/time you’d like it to occur. Make it during off hours since it might require a reboot.
- Hit Finish.
NEXT we’ll run the task now.
- Single-click the new “Update Operating System” task (or whatever you called it in Step 3 above).
- Click Run On.
- Click Target at left.
- Add computer->esmc.local->ok
- Hit Finish.
- Computers->click the esmc.local system and press Send wake-up call.
Give it some time to complete, and then….
– Robbie